If you are new to programming and want to understand how Arduino programs work, read this. This article explains how to structure an Arduino program.
To emphasize the agile nature of Arduino development, Arduino programs are commonly referred to as sketches. A sketch and a program can be used interchangeably.
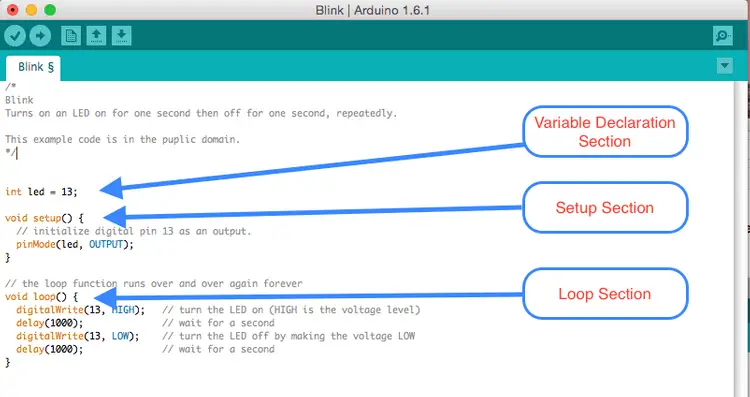
These sketches contain the code – the instructions the board will follow. All sketches are divided into two parts – setup function and loop function. You should put code that will run only once (for example, code to set up a board for the application) in the setup function. The loop function contains the code that will be run continuously after the initial setup is complete.
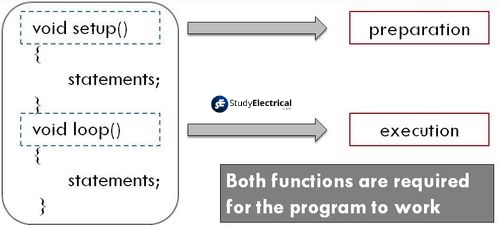
Here is a typical sketch:
const int ledPin = 13; // LED connected to digital pin 13

// The setup() method runs once, when the sketch starts
void setup()
{
pinMode(ledPin, OUTPUT); // initialize the digital pin as an output
}

// the loop() method runs over and over again,
void loop()
{
digitalWrite(ledPin, HIGH); // turn the LED on
delay(1000); // wait a second
digitalWrite(ledPin, LOW); // turn the LED off
delay(1000); // wait a second
}
Once the board has uploaded the code, or once it has been turned on with that code, it executes the instructions sequentially from the top of the sketch. The setup function runs the code once. Then, it runs the code in a loop. The loop continues until it reaches the end (denoted by the closing bracket, }), and then it returns to the beginning of the loop.
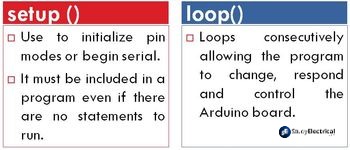
Example of Structured Arduino Program
In this example, a HIGH and LOW output is written to a pin continuously to flash the LED. See An Introduction to the Arduino for Beginners to learn more about using Arduino pins.
const int ledPin = 13; // LED connected to digital pin 13

// The setup() method runs once, when the sketch starts
void setup()
{
pinMode(ledPin, OUTPUT); // initialize the digital pin as an output
}

// the loop() method runs over and over again,
void loop()
{
digitalWrite(ledPin, HIGH); // turn the LED on
delay(1000); // wait a second
digitalWrite(ledPin, LOW); // turn the LED off
delay(1000); // wait a second
}
Upon beginning the sketch, the code in setup sets the pin mode (which allows it to light an LED). Once the code in setup is run, the code in loop (which flashes the LED) is continually used throughout the duration of the Arduino board is powered on.
Where is main()?
While you do not need to know this to create Arduino sketches, experienced C/C++ programmers may wonder where the expected main() entry point function is. Although it’s still there, the Arduino build environment hides it under its covers.
In addition to the sketch code, the build produces an intermediate file that includes the following statements:
int main(void)
{
  init();

  setup();

  for (;;)
     loop();

  return 0;
}
Init() is the first function to be called, which initializes the Arduino hardware. This is followed by a call to the sketch’s setup() function. After that, the loop() function is repeated over and over. Since the for loop never ends, the return statement is never executed.
